以太坊去中心化网页钱包开发系列,将从零开始开发出一个可以实际使用的钱包,本系列文章是理论与实战相结合,一共有四篇:创建钱包账号、账号Keystore文件导入导出、展示钱包信息及发起签名交易、发送Token(代币),这是第三篇介绍使用ethers.js的钱包对象获取相关信息及发起你离线交易。
使用 Provider 连接以太坊网络
我们前面两篇文章介绍创建(或导入)钱包账号的过程都是是离线的,即不需要依赖以太坊网络即可创建钱包账号,但如果想获取钱包账号的相关信息,比如余额、交易记录,发起交易的话,就需要让钱包连上以太坊的网络。
不管是在 Web3 中,还是Ethers.js 都是使用 Provider 来进行网络连接的,Ethers.js 提供了集成多种 Provider 的方式:
- Web3Provider: 使用一个已有的web3 兼容的Provider,如有MetaMask 或 Mist提供。
-
EtherscanProvider 及 InfuraProvider: 如果没有自己的节点,可以使用Etherscan 及 Infura 的Provider,他们都是以太坊的基础设施服务提供商,Ethers.js 还提供了一种更简单的方式:使用一个默认的provider, 他会自动帮我们连接Etherscan 及 Infura。
连接Provider, 通常有一个参数network网络名称,取值有:
1
let defaultProvider = ethers.getDefaultProvider('ropsten');homestead,rinkeby,ropsten,kovan, 关于Provider的更多用法,可以参考Ethers.js Provider。 - JsonRpcProvider 及 IpcProvider: 如果有自己的节点可以使用,可以连接主网,测试网络,私有网络或Ganache,这也是本系列文章使用的方式。
1 2 3 4 5 |
// 连接本地的geth 节点,8545是geth 的端口 var provider = new ethers.providers.JsonRpcProvider("http://127.0.0.1:8545");
// wallet 为前两篇文章中生成的钱包对象, activeWallet就是后面可以用来请求余额发送交易的对象 var activeWallet = wallet.connect(App.provider); |
启动geth的需要注意一下,需要使用 --rpc --rpccorsdomain 开启 RPC通信及跨域,
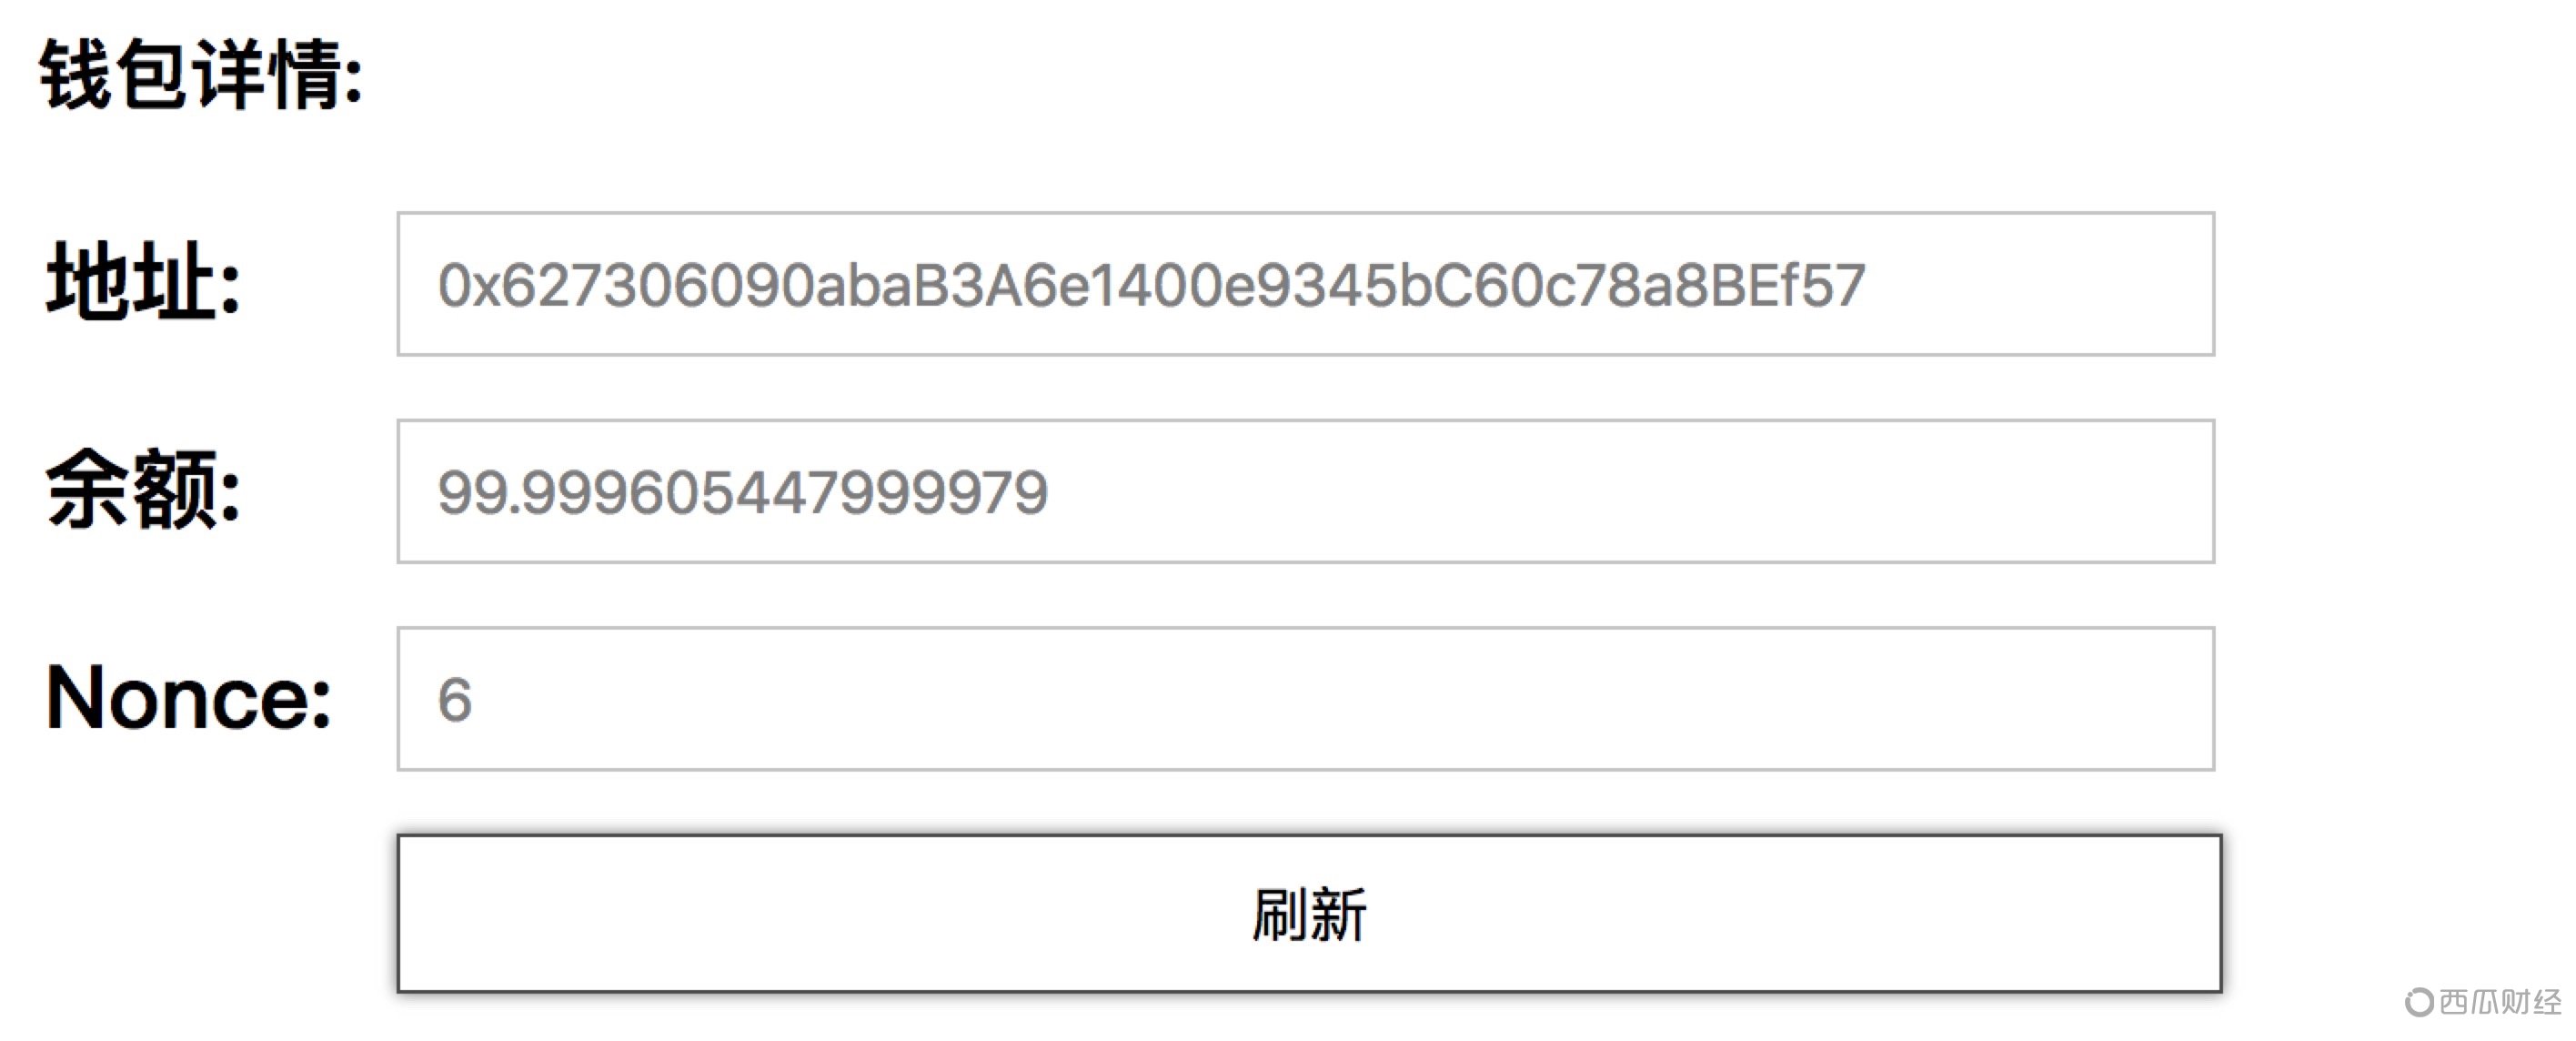
展示钱包详情:查询余额及Nonce
连接到以太坊网络之后,就可以向网络请求余额以及获取账号交易数量,使用一下API:
1 2 3 4 5 |
activeWallet.getBalance().then(function(balance) { });
activeWallet.getTransactionCount().then(function(transactionCount) { }); |
1 2 3 4 5 6 7 8 9 10 11 12 13 14 15 16 17 18 19 20 21 22 23 |
<h3>钱包详情:</h3> <table> <tr><th>地址:</th> <td> <input type="text" readonly="readonly" class="readonly" id="wallet-address" value="" /></div> </td> </tr> <tr><th>余额:</th> <td> <input type="text" readonly="readonly" class="readonly" id="wallet-balance" value="0.0" /></div> </td> </tr> <tr><th>Nonce:</th> <td> <input type="text" readonly="readonly" class="readonly" id="wallet-transaction-count" value="0" /></div> </td> </tr> <tr><td> </td> <td> <div id="wallet-submit-refresh" class="submit">刷新</div> </td> </tr> </table> |
1 2 3 4 5 6 7 8 9 10 11 12 13 14 15 16 17 18 19 20 |
var inputBalance = $('#wallet-balance'); var inputTransactionCount = $('#wallet-transaction-count');
$("#wallet-submit-refresh").click(function() { // 获取余额时, 包含当前正在打包的区块 activeWallet.getBalance('pending').then(function(balance) { // 单位转换 wei -> ether inputBalance.val(ethers.utils.formatEther(balance, { commify: true })); }, function(error) { }); activeWallet.getTransactionCount('pending').then(function(transactionCount) { inputTransactionCount.val(transactionCount); }, function(error) { }); }); // 模拟一次点击获取数据 $("#wallet-submit-refresh").click(); |
发送签名交易
之前我们有一篇文章:如何使用Web3.js API 在页面中进行转账介绍过发起交易,不过当时的签名是利用MetaMask来完成的,现在我们要完成一个钱包,必须要发送一个签名交易,签名交易也称为离线交易(因为这个过程可以离线进行:在离线状态下对交易进行签名,然后把签名后的交易进行广播)。
尽管 Ethers.js 提供了非常简洁的API来发送签名交易,但是探究下简洁API背后的细节依然会对我们有帮助,这个过程大致可分为三步:
- 构造交易
- 交易签名
- 发送(广播)交易
构造交易
先来看看一个交易长什么样子:
1 2 3 4 5 6 7 8 9 10 |
const txParams = { nonce: '0x00', gasPrice: '0x09184e72a000', gasLimit: '0x2710', to: '0x0000000000000000000000000000000000000000', value: '0x00', data: '0x7f7465737432000000000000000000000000000000000000000000000000000000600057', // EIP 155 chainId - mainnet: 1, ropsten: 3 chainId: 3 }
|
to 和 value: 很好理解,就是用户要转账的目标及金额。 data: 是交易时附加的消息,如果是对合约地址发起交易,这会转化为对合约函数的执行,可参考:如何理解以太坊ABI nonce: 交易序列号 chainId: 链id,用来去区分不同的链(分叉链)id可在EIP-55查询。
nonce和chainId有一个重要的作用就是防止重放攻击,如果没有nonce的活,收款人可能把这笔签名过的交易再次进行广播,没有chainId的话,以太坊上的交易可以拿到以太经典上再次进行广播。
gasPrice和gasLimit: Gas是以太坊的工作计费机制,是由交易发起者给矿工打包的费用。上面几个参数的设置比较固定,Gas的设置(尤其是gasPrice)则灵活的多。
gasLimit 表示预计的指令和存储空间的工作量,如果工作量没有用完,会退回交易发起者,如果不够会发生out-of-gas 错误。 一个普通转账的交易,工作量是固定的,gasLimit为21000,合约执行gasLimit则是变化的,也许有一些人会认为直接设置为高一点,反正会退回,但如果合约执行出错,就会吃掉所有的gas。幸运的是web3 和 ethers.js 都提供了测算Gas Limit的方法,下一遍发送代币
gasPrice是交易发起者是愿意为工作量支付的单位费用,矿工在选择交易的时候,是按照gasPrice进行排序,先服务高出价者,因此如果出价过低会导致交易迟迟不能打包确认,出价过高对发起者又比较亏。
web3 和 ethers.js 提供一个方法 getGasPrice() 用来获取最近几个历史区块gas price的中位数,也有一些第三方提供预测gas price的接口,如:gasPriceOracle、 ethgasAPI、 etherscan gastracker,这些服务通常还会参考当前交易池内交易数量及价格,可参考性更强,
常规的一个做法是利用这些接口给用户一个参考值,然后用户可以根据参考值进行微调。
交易签名
在构建交易之后,就是用私钥对其签名,代码如下:
1 2 3 |
const tx = new EthereumTx(txParams) tx.sign(privateKey) const serializedTx = tx.serialize() |
发送(广播)交易
然后就是发送(广播)交易,代码如下:
1 2 3 4 |
web3.eth.sendRawTransaction(serializedTx, function (err, transactionHash) { console.log(err); console.log(transactionHash); });
|
1 2 3 4 5 6 7 |
activeWallet.sendTransaction({ to: targetAddress, value: amountWei, gasPrice: activeWallet.provider.getGasPrice(), gasLimit: 21000, }).then(function(tx) { });
|
用ethers.js 实现发送交易
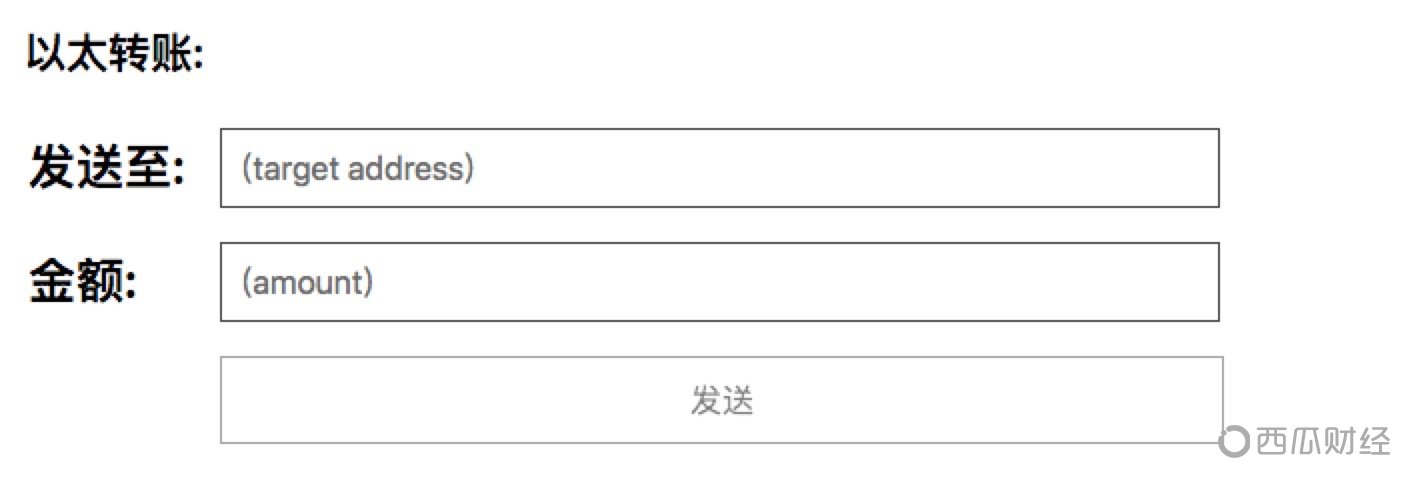
先来看看发送交易的UI界面:
1 2 3 4 5 6 7 8 9 10 11 12 13 14 |
<h3>以太转账:</h3> <table> <tr> <th>发送至:</th> <td><input type="text" placeholder="(target address)" id="wallet-send-target-address" /></td> </tr> <tr> <th>金额:</th> <td><input type="text" placeholder="(amount)" id="wallet-send-amount" /></td> </tr> <tr> <td> </td> <td> <div id="wallet-submit-send" class="submit disable">发送</div> </td> </tr> </table> |
1 2 3 4 5 6 7 8 9 10 11 12 13 14 15 16 17 18 |
var inputTargetAddress = $('#wallet-send-target-address'); var inputAmount = $('#wallet-send-amount'); var submit = $('#wallet-submit-send');
submit.click(function() { // 得到一个checksum 地址 var targetAddress = ethers.utils.getAddress(inputTargetAddress.val()); // ether -> wei var amountWei = ethers.utils.parseEther(inputAmount.val()); activeWallet.sendTransaction({ to: targetAddress, value: amountWei, // gasPrice: activeWallet.provider.getGasPrice(), (可用默认值) // gasLimit: 21000, }).then(function(tx) { console.log(tx); }); }) |
参考文档
- ethereum-tx
- EIP-55
- Ethers.js
深入浅出区块链知识星球最专业技术问答社区,加入社区还可以在微信群里和300多位区块链技术爱好者一起交流。
本文地址: https://www.xiguacaijing.com/news/xingye/2018/2319.html










赞助商